• HOME
  • ABOUT
    • PROFILE
    • BACKSTORY
    • WORKFLOW
    • NEWS LETTER
  • PORTFOLIO
    • GALLERY
    • SLIDE SHOW
    • PROJECTS
  • HIRE ME
  • BLOG
  • CONTACT
  • SHOP
    • SHOP ITEMS
    • CART
    • CHECKOUT
Art, designs, illustrations, text and content © 2022 BenKrefta.Com

I made my own T-shirt

by Ben August 04, 2015 in Art, Art Talk, Personal 0 comments tags: art, design, review, tshirt

Designing something a bit different

Most designs you find at local retailers are boring, ordinary, common or look cheap and tacky- especially this recent craze for rectangle prints on the fronts of t-shirts which look like an uninspiring ink-jet transfer paper job. A design on shirts, any other clothing, or even tattoos on skin need to be placed properly. A top-heavy shirt with a design covering just the shoulders and chest or an a-symmetric piece of artwork can look great, but most companies just churn out the same, basic, small to medium sized square or round design slapped in the centre with no consideration to flow, composition or just trying to do something a bit different.

Tshirt doodle design1
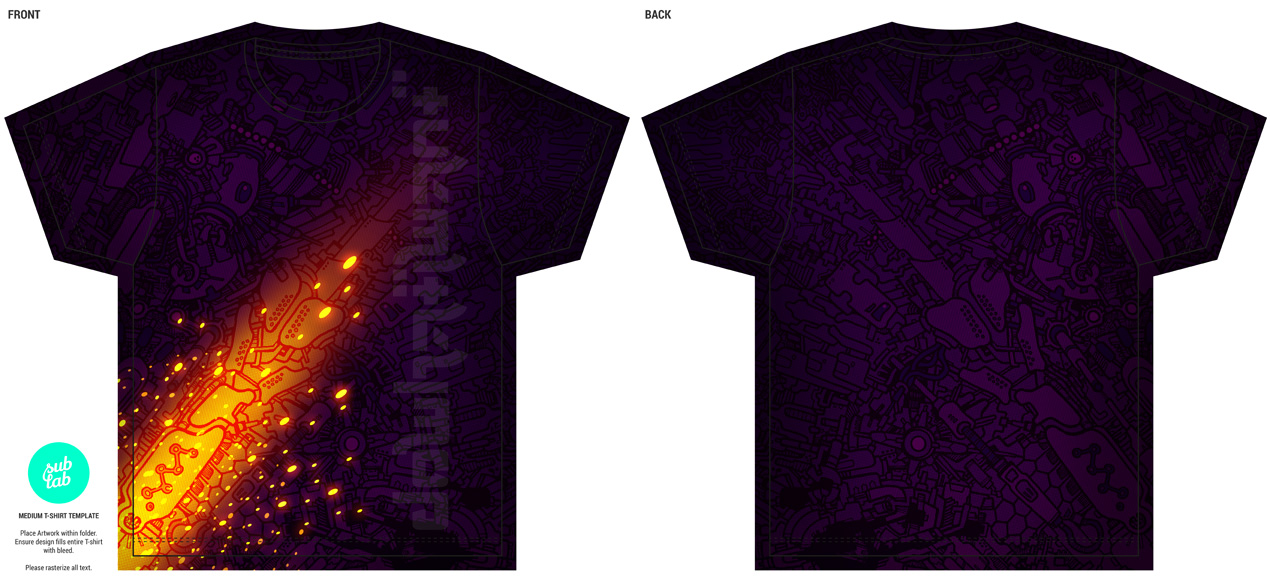
Recently I designed a full-print shirt with one of my doodle-mech designs after stumbling upon a UK company who can process full-coverage 'dye sublimation' shirts at small quantities. Check out www.sublab.co.uk for more info. I designed the shirt to fit the provided template, then sent it back as a PSD Photoshop file. Wanted a dark purple tee with contrasting orange for a while, so here's my opportunity to get one :)


All-Over Shirt printing

There was no mention of shirt dimensions other than chest size on site at the time, so did a little research for "American apparel t-shirt" to get a fairly good idea of the size I'd need. Being 6'1" male, with a 40" chest and 35" waist, I went for a medium and it fit pretty well. Some sizes hinted at a large being more appropriate for me. Although I prefer a slightly tighter fit, so wonder if a 'small' (described as a 34-36" chest size) would have looked better on my frame? I wondered if it would be possible to find and supply your own shirts for printing to guarantee a better fit? If spending over £30 for a t-shirt, you'd hope for it to fit well as well as look good.

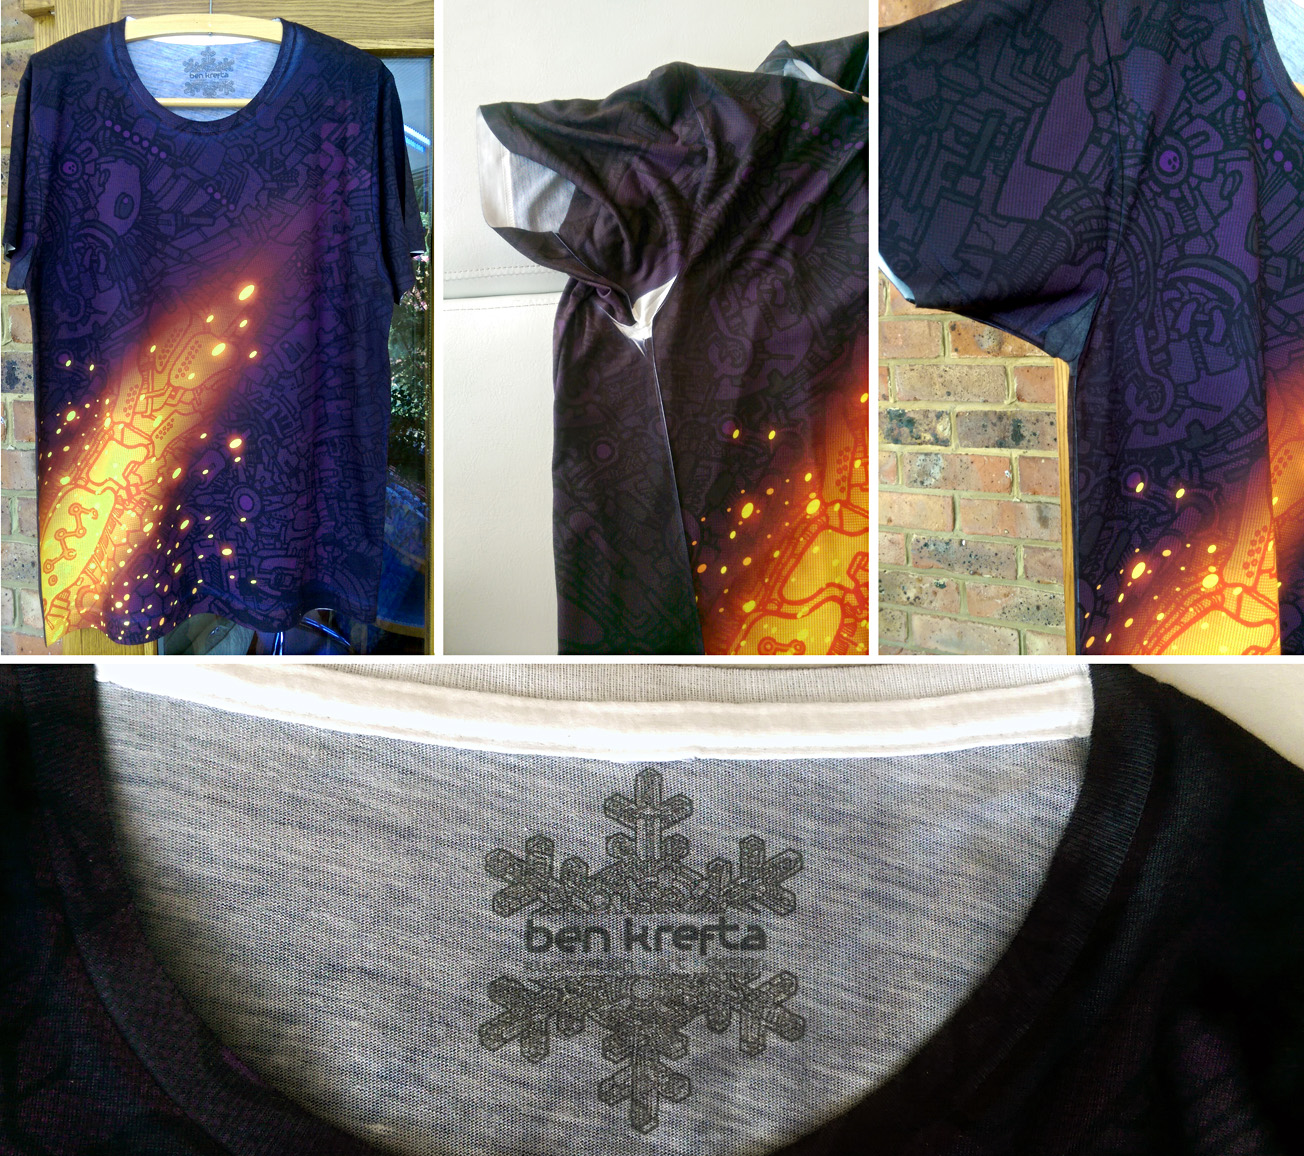
The design came out very nicely with colours nearly as vibrant as my RGB computer screen. Tonal contrast was lacking a touch in certain areas, which is worth taking into consideration when designing my next shirt. There wasn't enough contrast with the subtle greys on the inside neck logo, so would also look to make that darker for next time. Very fine lines don't show up so well- keeping things a little bigger and bolder is the way to go.

The biggest problem was the inevitable white creases around the seams and armpit areas. Patches, nooks and crannies where the print doesn't reach. I knew there would be a strong possibility of this happening and they looked pretty bad if the arms were raised. I manually filled these areas with a black Sharpie, which over time fades out to a grey tone. Took some effort but now looks A LOT better than it did upon arrival, and probably not noticeable unless pointed out. I'm hoping it'll hold up in the wash. I may need to try other permanent ink or fabric markers if not.


The Result

I like the idea of selling full front and back print shirt designs, but with my mark-up on top, I'm not sure people would be willing to pay £40-£50 for a single t-shirt? It may not be everyone's cup of tea, so for now I'll continue to create my own custom shirts from time to time for personal use and leave it at that. Many thanks to Sublab for providing the opportunity to try this. The shirt looks awesome!

Tshirt doodle photo2

Tshirt doodle photo1

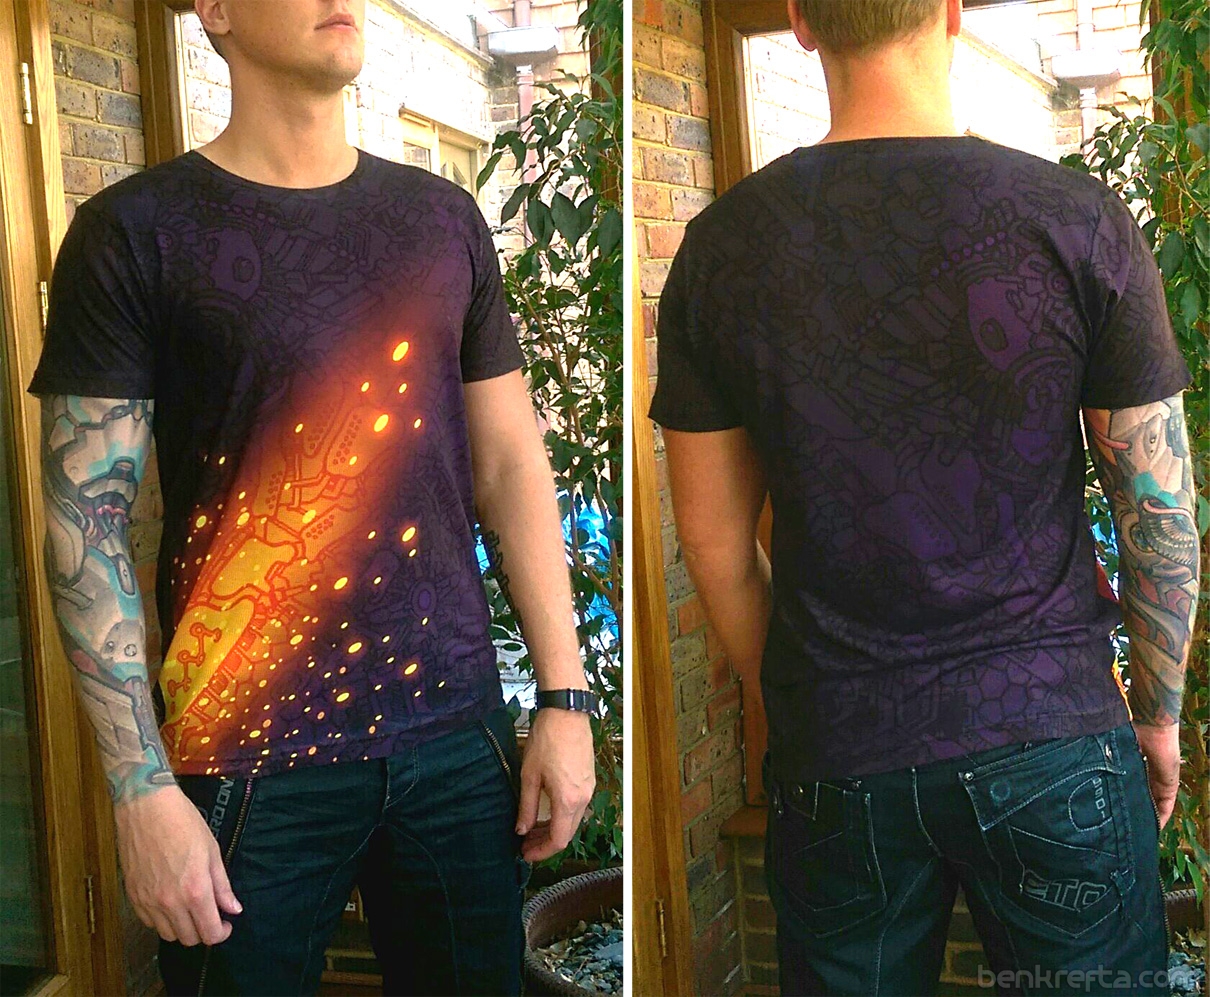
Apologies for the poor photo quality of on my phone, but you get the idea :)

Leave a Reply

New Set up and Wacom Cintiq 22HD Review

by Ben July 06, 2014 in Art Talk 5 comments tags: art, review

New set up: Enhanced Lenovo Y500 Notebook PC running Photoshop CS6 + a Cintiq 22HD mounted onto Dual Ergotron LX Arms:Wacom Cintiq 22 DesktopThe Cintiq 22HD

I've now used it for three or four artworks over the last few months and it's working out well. I have it in a floating, elevated position for day to day use and bring it down to the desk at around a 45 degree angle for art projects (see above). I decided to program the Cintiq buttons from top to bottom (for Photoshop use) as:

  • Step Forward
  • Step Backward
  • x (swap foreground and background colour)
  • b (brush tool)
  • Touch strip: mostly use for brush size
  • Ctl
  • Alt
  • Shift
  • Pan/ Hand tool

These would work great for me. The trouble is I often forget to use the the Cintiq's buttons as I'm so used to keyboard keys. And while, in theory, simply having to shift my right thumb to press the buttons would potentially simplify and speed up work flow, most projects still require me to use several other useful short cut keys so often neglecting the buttons and instead sticking exclusively to the keyboard seems to make sense right now.

The screen size is good. I didn't feel I needed the extra couple of inches from the 24" version, and the lower weight from the 22 incher means the adjustable arm I use doesn't have a problem keeping it suspended off the desk. It's not cutting edge screen tech, but gives a good quality result far greater than my previous monitor set up and I have no complaints. Also glad I didn't pay the extra for the touch version as I doubt I'd make use of those features.

At the moment the pen uses a standard nib, which I'll probably change to a felt nib as I like the added friction and softer tip feel. I'm still wondering if I need to get a 'Smudge-guard' glove to reduce palm friction. So far I've not really found this to be a problem so I'll stick without and see how I get on using it over the coming year.

The Set up

My keyboard [Microsoft Wireless 6000 v3.0] sits to my left (since I'm right handed) and it's pretty comfortable to use while I rest my palm on the desk/palm rest and my elbow on my chair's arm.

I've since extended the Ergotron laptop arm so the screens don't butt up against each other or need to overlap and there's enough space under the tech to clean and dust. All cabling is concealed within the arms themselves.

My printer [Epson 1500W Stylus Photo A3+] fits nicely at the back in the corner typically covered with a custom made cover to keep dust at bay.

My mouse [Microsoft Wireless Mobile 6000] sits on a gel filled mat, which saves me from RSI.

The Cintiq is connected to the laptop via a DVI to HDMI cable. This required opening up the back of the tablet to attach (twice, since I've since extended to cable length from 2m to 3m).

I also bought a Intuos Pen for when I take my laptop elsewhere and obviously the Cintiq has to stay at home. I've used it the Intuos once so far and liking it. I'd better start coming up with some new artworks so I can put this new tech to use.


Leave a Reply

Sign up to Newsletter
For art-related news, updates, a 15% discount on all art print orders PLUS be entered into a free bi-monthly prize-draw to win a mini art print!

Many thanks for subscribing!


FEATURED PRODUCTS
  • Anime Bowsette
    Bowsette Art Print - A3
    £17.99 – £27.99
  • Demon Slayer Art Ben Krefta
    Demon Slayer Tanjiro and Nezuko Print - A3
    £17.99 – £27.99
  • Dio and the World - Men's
    T-SHIRT Dio and the World - Short Sleeve Tee
    Sale Product on sale
    £24.99 £19.99
  • Mens Junko Danganronpa Tshirt
    T-SHIRT Danganronpa - Short Sleeve Tee
    Sale Product on sale
    £24.99 £19.99
  • Japanese Geisha Wall Art Canvas
    Japanese Geisha Wall Art Canvas
    £32.99 – £692.99
  • World War Skull Art
    World War Skull Wall Art Canvas
    £32.99 – £692.99


BLOG ARCHIVES

RSS Feed RSS – Posts

RSS Feed RSS – Comments


Return to blog start...